

This article is a tutorial and recipe for a lovely herbal springtime beer, or ale you can make at home. It’s delicious, and it’s good for you too! Being self-reliant and knowing how to do things sure has its perks! Learn to make your own easy healthy home brew with herbs.
My husband and I are in a phase of constant home brewing. There are several reasons for this! First off, Mr. V. LOVES beer. He's always outside working in the yard when he's home, and he loves to have a cold beer handy for refreshment.
Amazingly, he drinks moderately and never gets tipsy---he just likes it as a refreshing drink. Second, we are trying to not buy so many things at the store. If we can make it, we do. Beer-making is fun, easy, and it's quite the creative process!
Third, making your own home-brew is WAY healthier than buying the pasteurized commercial beer that contains flavorings and chemical additives. You're getting the health benefits from the herbs you choose, and also the probiotics from the fermentation process.
I recently took a course on The Craft of Herbal Fermentation Course">The Craft of Herbal Fermentation through the Herbal Academy of New England, and it was very freeing! The instructors of this online course provide excellent information, and lots of common-sense options.
See, when you go to a brew store, the owners and salespeople are often "beer snobs," which means there's only ONE right way to do everything (Theirs!). Really? That's NOT what I learned in the The Craft of Herbal Fermentation Course">Craft of Herbal Fermentation Course.
So, I just go on in, get what I need, and try not to engage in too many discussions. HOWEVER, I am going to bring in a bottle of this Mugwort, Elderflower, & Ginger Ale to my beer guy. I know he's going to love it!
For other beer and ale making articles, you might enjoy: How to Make Chamomile Ale, How to Make "Easy" Hard Cider, and How to Make Herbal Beer--Spring Bitters.
FTC Disclosure: There are affiliate links scattered throughout this article. If you click through one and make any kind of purchase, I may earn a very small commission at no extra cost to you!

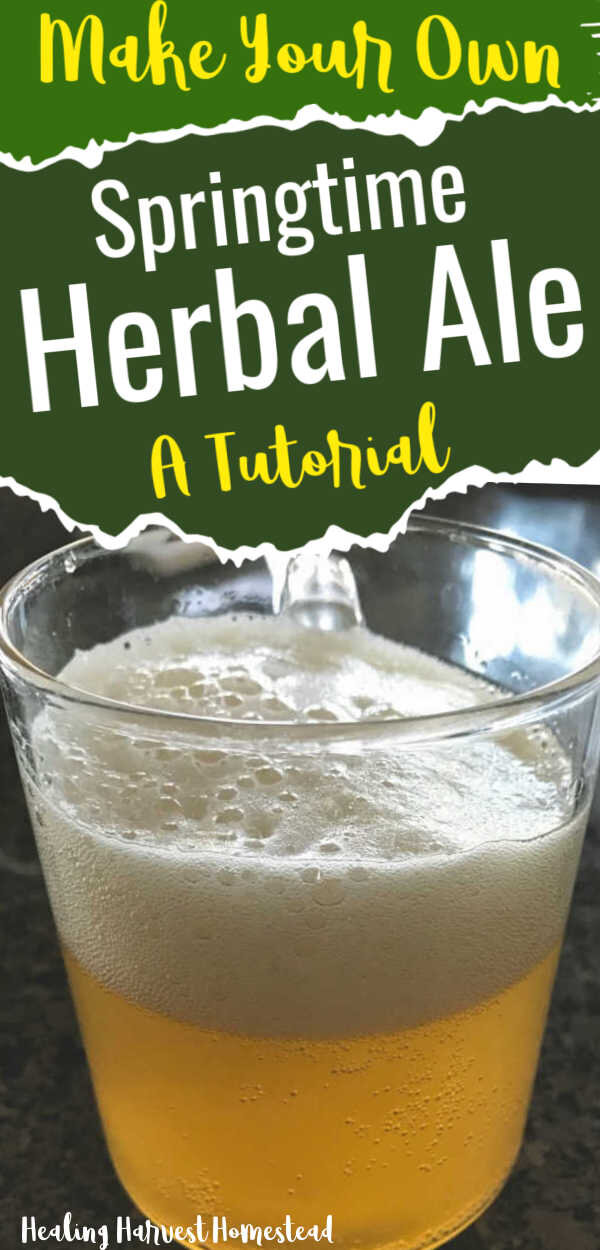
Learn the step-by-steps to making your own Herbal Beer! It's easy, creative, and healthy! I think everyone should be making their own beer and ale! :-) SO much better than the commercial versions. This recipe is for Mugwort, Elder Flower, and Ginger Beer---It is seriously delicious and refreshing!
At any rate, I was reading one of my favorite beer brewing books: Stephen Buhner's, Ancient Herbal Healing Beers, and he has a section about how in Europe, hundreds of years ago, Mugwort was a popular herb to use for making ale.
So, I created this recipe with some mugwort, elder flowers I foraged, and a bit of ginger…and I am amazed by how wonderful it turned out! Here it is, just for you:
Recipe for Mugwort, Elderflower, & Ginger Beer
Ingredients
(This is for a three gallon batch.)
About 4 ounces of Mugwort
About 4 ounces of Elder Flowers
About 3 ounces of Ginger Root (dried) --If you want to use fresh, just cut the amount in half, as the juices will make it stronger.
***NOTE: I purchase my herbs through Starwest Botanicals. Their herbs are high quality, and you can choose organic.
33 ounces of organic cane sugar (I purchase this at Costco)
1 packet (5 g) of Lalvin Yeast
Distilled water, 3-4 gallons (I just use our tap water, as it comes from a well. If you plan on using your tap water, you should let it sit for 24 hours if it has chlorine in it.)
Where I buy my herbs: I've found the best place to buy quality herbs in a choice of different sizes is Starwest Botanicals. You can buy wildcrafted and organic too!
Tools You'll Need to Brew Your Beer
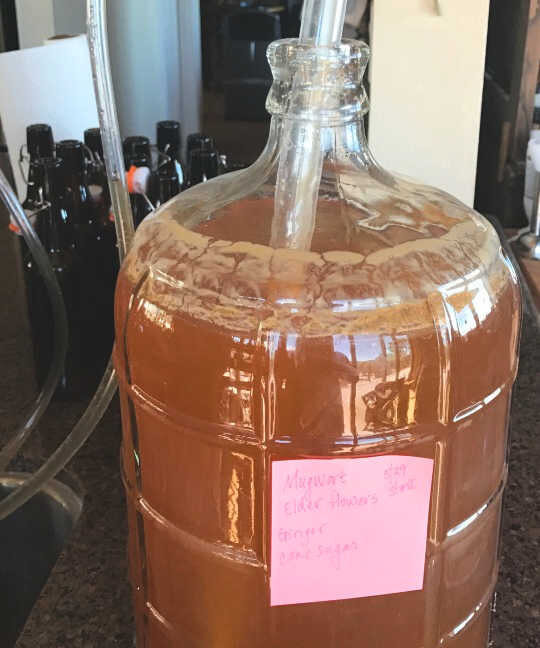
1) A 3 gallon carboy. If you cut the recipe roughly in thirds, you'll need a 1 gallon jug.
2) An airlock with a bung (this link is to fit a glass 3 gallon carboy)
3) A strainer
4) A funnel
5) A beer syphon
6) Beer bottles...I use the Grolsch bottles, because you can really get the best seal this way.
7) A large glass jar for making your wort (tea)...I use a half-gallon Mason jar
8) A bottle drying rack
That's pretty much it! You can get fancy things like a tool for determining alcohol content or a long beer stirring spoon, but I don't generally bother with those things. Once you have the basics above, you can make beer any time!
Get my eBook on How to Relax Using Herbs FREE!Directions for Mugwort, Elderflower, & Ginger Beer
Step 1) Make Your Wort (Tea)
Place your herbs in either a half-gallon or gallon glass jar (heat resistant is best, like a Mason jar). Pour just boiled water to within an inch of the top of the jar. If you are using a half gallon jar, you'll have to definitely do some stirring as the Mugwort and Elderflower both soak up a lot of liquid. Add more hot water as needed, as a few minutes go by. You'll notice the level of water decreasing as the herbs soak it up.
Let this tea sit for 30 minutes to an hour. The longer it sits, the stronger tea you will have. These herbs are good about not becoming too bitter or tannic.
Step 2) Measure Out Sugar
While your tea is steeping, pour your sugar into the glass Carboy using a Funnel.
Step 3) Combine the Tea and Sugar
Now, using your funnel again, with the strainer inserted on top or in it, pour your tea into the carboy, straining out the plant matter. Your liquid should still be pretty hot, and this will make the sugar dissolve more quickly. You'll have a very strong, very sugary tea in your Carboy. You can add more hot water if you need to now.
Step 4) Add Water
Now, add more water to the jug. If you add cold water, then your temperature of the tea will be perfect for yeast. It needs to be around body temperature or lower.
So, lukewarm or less. Less warm is best! I add the water up to the curve in the jug or an inch or so higher. I don't fill the jug all the way. I don't know what other people do, but I like leaving a good amount of head space, as I've had some bubbly brews!
Step 5) Pitch Your Yeast
Gently pour your yeast into the Carboy. It will sit on top of the wort for awhile, then begin to sink. It's fascinating to watch the fermentation process begin! You'll definitely start seeing some activity in just a few minutes! Your brew will bubble like crazy for about a week, then calm down some.
Step 6) Ferment
Let your carboy sit undisturbed in a quiet place for at least two weeks, until you are sure it's no longer bubbling and the sugars are gone. I'll often let ours ferment for three weeks, and I've noticed this really helps balance and mellow the tastes too.
The beer expert at our local home brew store told me that that's the biggest reason for people experiencing explosions of their bottled beer....They get impatient with the initial fermentation process and bottle it too early, while there is still sugar in the ferment. My fermentation course I took upheld this information.
Getting ready to prime and bottle!
Step 7) Sanitize Your Beer Bottles
Again, you can get all fancy, but I just wash them in super hot soapy water (our water is practically boiling), and rinse really well. I use a bottle dryer to be sure they are completely dry and stay clean.
Step 8) Prime Your Beer Bottles
If you are using 16 ounce beer bottles, use a rounded 1/2 teaspoon of sugar per bottle. Using a small funnel, pour the sugar into the bottles. I generally use about seven beer bottles per gallon of brew, so in this case, we used about 21 bottles. (We had a little cupful left over, and my husband did a little pre-taste test---Winner!)
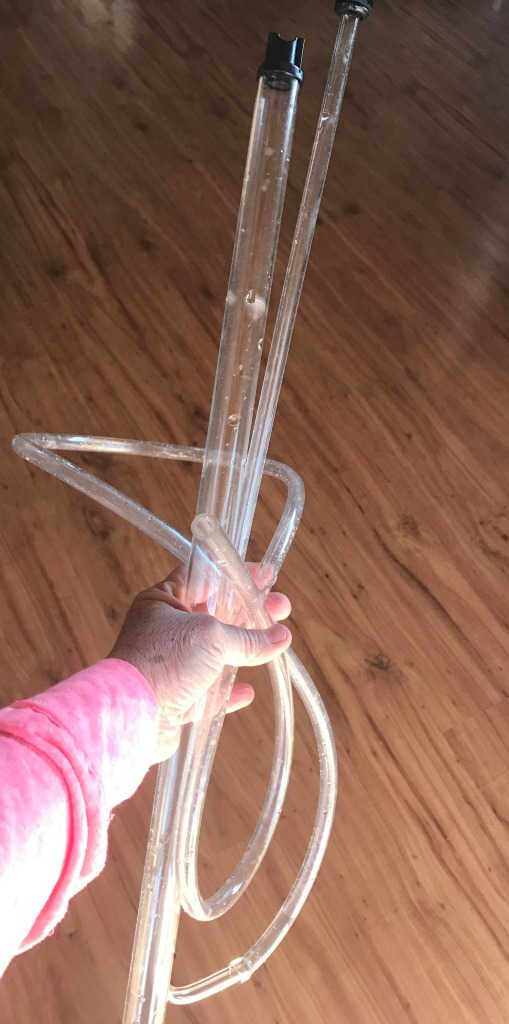
A siphon makes the bottling process very easy!
Step 9) Bottle Your Brew!
Here's where you get your handy syphon, and placing the end in the bottom of your carboy (don't shake it because you'll see about an inch of yeast waste on the bottom, and you don't want too much of that floating around in your beer. It won't hurt you, but some people like a more clear beer, with less sediment), just start pumping your syphon.
It helps to have two people to do this part, although I've bottled my beer fine on my own. It's just a bit less messy and wasteful with two people, because the second person can move the syphon hose easily from bottle to bottle.
Step 10) Second Ferment to Carbonate Your Brew
Close up the tops tightly, rinse them off, and go put them in a cool place to do a final ferment for at least one more week. This is the stage where most of the carbonation comes from!
NOTE ON SAFETY: Please keep your beer bottles stored out of the way of children and pets. Although I've never once had a "beer explosion" I've heard of it happening, and it's nothing I ever want to experience. Be safe! Keep them out of the sun, in a cool, dark place, and don't shake them!
What a delicious, healthy homemade home brew! Fermentation: Love it!
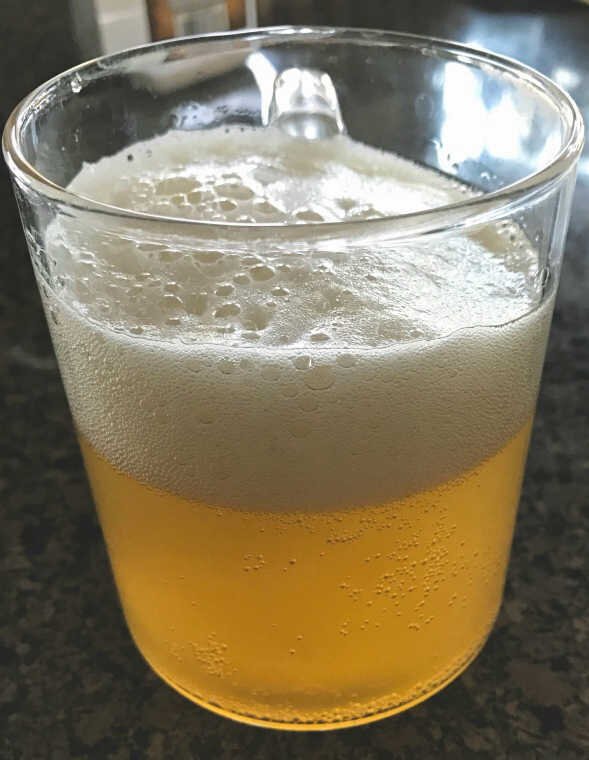
Step 11) Enjoy!
Here's the really fun part! You get to test out your beer creation!
Final Thoughts on Making Homemade Beer or Ale
Have fun! Be creative! Don't be afraid to change things up! What I do, if I'm trying a new recipe I'm not super sure of, is use only a 1 gallon carboy. That way, I'm not wasting a bunch of brew and time, right?
Do you make your own home brews? Do you have any tips or tricks you'd like to share? I'd love to hear from you, and if you happen to try out this recipe, let me know how it goes! :-)
Hugs, Health, & Self-Reliance,
Heidi
P.S. If you haven't done so yet, I hope you'll sign up for our weekly newsletter and get free updates. You’ll get immediate access to the FREE Resource Library that’s filled with downloadable, printable resources for your herbal and self-reliant lifestyle! Just complete the form below:
Check out The Healing Harvest Homestead School of Herbalism and Traditional Skills. Just click here for more information.
Making your own beer or ale is really quite simple. You can even use herbs you forage yourself to make a unique and lovely tasting, healthy home brew. Here’s a tutorial for how to make a springtime home brewed beer you’ll just love! #homebrew #homemadebeer #homemadeale #beer #herbal #howtomake #recipes #fermentation #healingharvesthomestead #healthydrink